
OpenClaw (MoltBot) Setup Guide: Ubuntu + NVIDIA + Ollama + GLM-4.7 + Telegram
Running a personal AI assistant that never sends your data to a third-party cloud, costs nothing per token, and responds directly in your Telegram chat is no longer a weekend research project — it is a single afternoon of setup. This guide walks you through the complete OpenClaw setup on bare-metal Ubuntu, from NVIDIA driver installation to your first Telegram conversation powered by GLM-4.7 running locally through Ollama.
OpenClaw was renamed from MoltBot in January 2026. The CLI command is now openclaw, and the legacy moltbot alias still works for existing scripts. Throughout this guide we use “OpenClaw” and the openclaw command consistently. If you are arriving from an older tutorial that references MoltBot, the concepts are identical — only the name changed. For a deeper look at what OpenClaw is and why the project matters, see our companion piece on what OpenClaw is and how it differs from standard chatbots.
What Is OpenClaw and Why Run It Locally?
OpenClaw is a personal AI gateway that bridges large language models to the messaging channels you already use — Telegram, WhatsApp, Slack, Discord, and others. Unlike deploying a raw chatbot, OpenClaw manages the gateway process, routes messages through a configurable agent layer, maintains session context, and handles channel authentication. Think of it as the middleware that sits between your LLM backend and your phone.
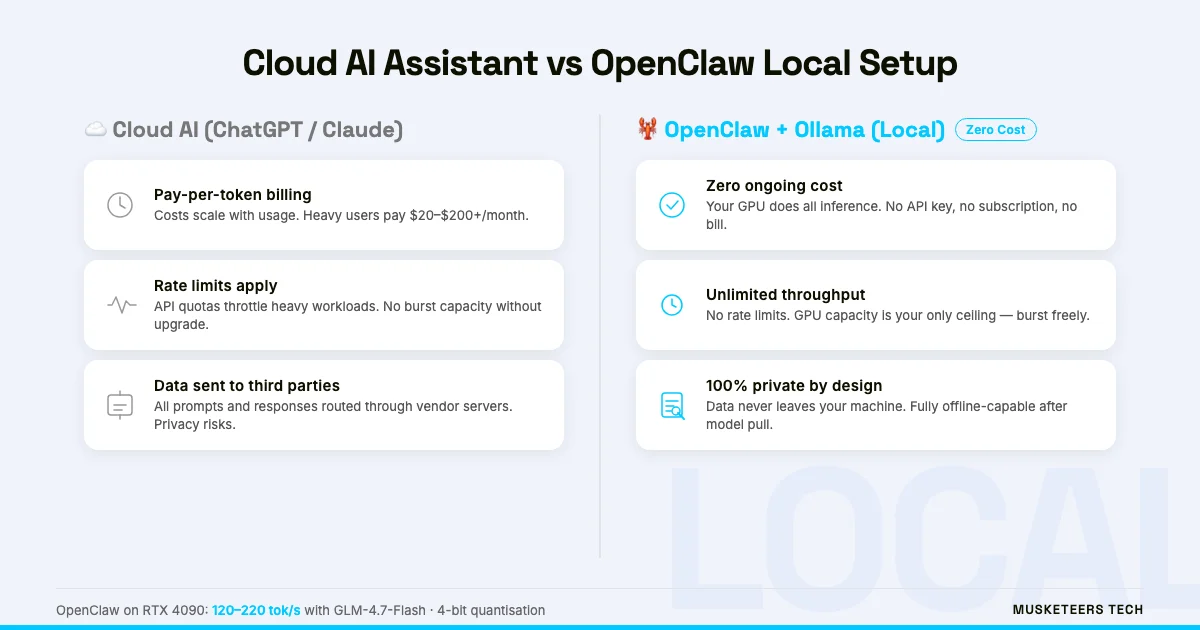
Running it locally with Ollama and GLM-4.7 has three concrete advantages over cloud-API setups:
- Zero token cost — Every inference runs on your GPU. There is no OpenAI or Anthropic bill, no matter how much you use it.
- Full data privacy — Your prompts, responses, and conversation history never leave your machine. Ideal for sensitive personal or business workflows.
- No rate limits — Cloud providers throttle heavy users. Your own GPU does not.
- Customisable model — Swap GLM-4.7 for any Ollama-compatible model without changing your OpenClaw config.
- Offline capable — Once models are pulled, the setup runs without an internet connection (Telegram itself still needs connectivity, but the LLM inference does not).
This approach makes the most sense for developers, power users, and teams who are already comfortable with Ubuntu servers and want a private AI assistant. If you would prefer a managed setup, our AI Agent Development team builds and maintains production agent systems.
Prerequisites: Hardware, Software, and Accounts
Before running a single command, verify you meet these requirements.
Hardware minimum:
- NVIDIA GPU with at least 8 GB VRAM (RTX 3060 or better). GLM-4.7-Flash in 4-bit quantisation fits comfortably on 8 GB; the full GLM-4.7 model needs 16–24 GB.
- 16 GB system RAM (32 GB recommended for larger context windows).
- 50 GB free disk space for the OS, Ollama, and model weights.
Software:
- Ubuntu 22.04 LTS or 24.04 LTS (fresh install recommended).
- Node.js 20 or later (required by the OpenClaw CLI).
- An internet connection for the initial driver and model downloads.
Accounts:
- A Telegram account. You will create a bot via BotFather — no additional subscription is needed.
- Optional: an npm account if you want to publish custom OpenClaw skills.
GLM-4.7 vs GLM-4.7-Flash
GLM-4.7 is the full reasoning model (16–24 GB VRAM). GLM-4.7-Flash is the quantised fast variant (8–12 GB VRAM) with slightly lower benchmark scores but significantly faster token generation. For most Telegram assistant use cases, Flash is the better choice.
Step 1 — Install Ubuntu and NVIDIA Drivers
If you are on a fresh Ubuntu install, the first task is getting your NVIDIA GPU recognised and the drivers stable. Skipping this step or using an out-of-date driver is the single most common cause of Ollama GPU acceleration failures.
Update the system first:
sudo apt update && sudo apt upgrade -y
sudo reboot
Install the recommended NVIDIA driver:
sudo ubuntu-drivers autoinstall
sudo reboot
After rebooting, confirm the GPU is visible:
nvidia-smiYou should see your GPU model, driver version, and VRAM usage. If nvidia-smi returns an error, run sudo ubuntu-drivers devices to list available drivers and install a specific version manually (e.g., sudo apt install nvidia-driver-550).
Install CUDA (optional but speeds up some model backends):
sudo apt install -y nvidia-cuda-toolkit
nvcc --version
Ollama’s built-in CUDA support does not require the full CUDA Toolkit — it ships its own CUDA libraries. Install the Toolkit only if you plan to run additional GPU workloads alongside Ollama.
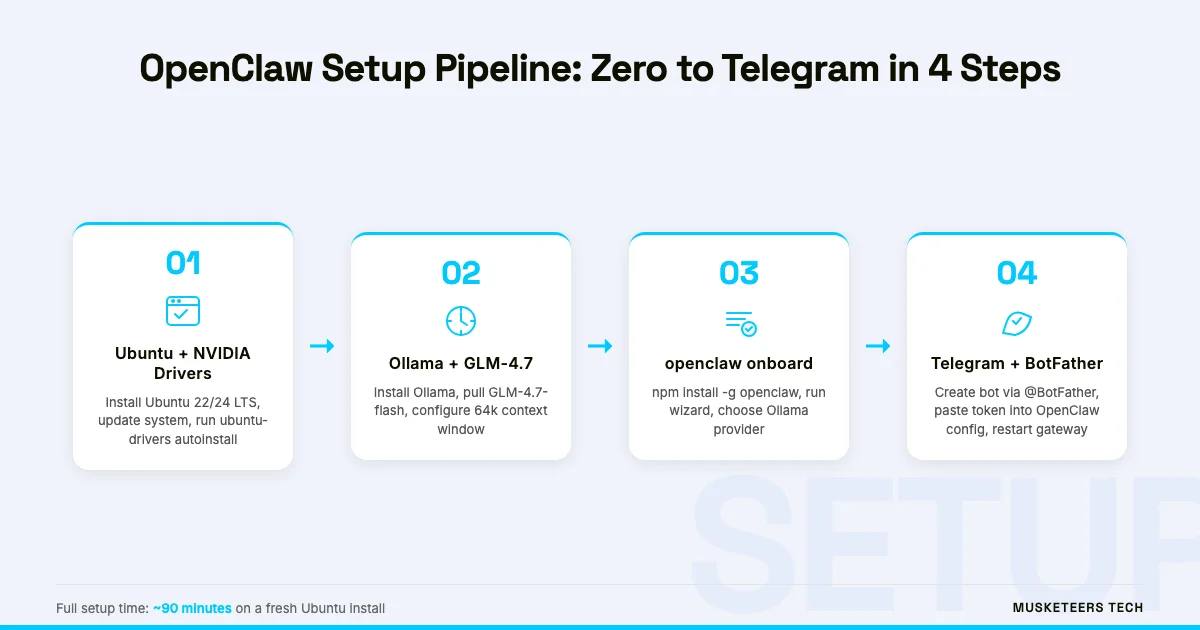
Step 2 — Install Ollama and Pull GLM-4.7
Ollama is the local model server that OpenClaw talks to. It handles model downloads, quantisation formats, context window management, and the OpenAI-compatible REST API that OpenClaw’s Ollama provider uses.
Install Ollama:
curl -fsSL https://ollama.com/install.sh | shThe install script detects your NVIDIA GPU automatically and configures the service. Verify Ollama is running:
ollama --version
systemctl status ollama
Pull the GLM-4.7-Flash model:
ollama pull glm-4.7-flashThis downloads approximately 5–6 GB of model weights. For the full GLM-4.7 model:
ollama pull glm-4.7Confirm the model loaded correctly:
ollama run glm-4.7-flash "Say hello in one sentence."If the model responds, Ollama is working. Exit with /bye.
GPU Acceleration Confirmed
While running ollama run, open a second terminal and check nvidia-smi. If you see GPU memory usage increase (from near 0 to several GB), CUDA acceleration is active. If usage stays at 0, Ollama is falling back to CPU — check your driver version.
Configure Ollama context window for OpenClaw:
OpenClaw’s agent layer benefits from a larger context window. Create or edit the Ollama model configuration:
ollama create glm-4.7-flash-ctx -f - <<EOF
FROM glm-4.7-flash
PARAMETER num_ctx 65536
EOF
Use glm-4.7-flash-ctx as your model name in the OpenClaw config (next step). A 64k context window lets OpenClaw maintain longer conversation histories and handle tool calls reliably.
Step 3 — Install OpenClaw and Run the Onboarding Wizard
With Ollama running, install the OpenClaw CLI via npm:
npm install -g openclawVerify the installation:
openclaw --versionIf you have an old moltbot installation, the alias is preserved. You can run either openclaw or moltbot — they point to the same binary. To verify:
which moltbot # should resolve to the same path as `which openclaw`Run the onboarding wizard:
openclaw onboardThe wizard walks you through five setup stages:
- Gateway initialisation — Creates
~/.openclaw/config.yamland the local device key. - LLM provider selection — Choose “Ollama” from the list.
- Ollama endpoint — Accept the default
http://localhost:11434or enter a remote Ollama host. - Model selection — Enter
glm-4.7-flash-ctx(the custom context-extended model from Step 2). - Channel setup — Select Telegram. You will be prompted for a bot token (obtained in the next step).
Do Not Skip the Onboarding Wizard
Editing ~/.openclaw/config.yaml manually before running openclaw onboard can leave the device key unregistered. Always run the wizard at least once on a fresh install. You can edit the YAML later for fine-tuning.
Step 4 — Create Your Telegram Bot with BotFather
Telegram bots are managed through a special bot called BotFather. You need a bot token to link Telegram to OpenClaw.
- Open Telegram and search for @BotFather.
- Start a conversation and send
/newbot. - BotFather asks for a display name (e.g.,
My OpenClaw Assistant) and a username ending inbot(e.g.,myopenclaw_bot). - BotFather returns an API token in the format
123456789:ABCDEFGHIJKLMNOPQRSTUVWXYZabcdefgh. - Copy this token — you will need it in the next step.
DM Policy: Private vs Group Bots
OpenClaw’s Telegram channel supports two DM policies: allowAll (anyone can message the bot) and whitelist (only your Telegram user ID can interact). For a personal assistant, use whitelist and add your own Telegram user ID. This prevents strangers from using your compute.
Step 5 — Connect Telegram to OpenClaw
Return to the openclaw onboard wizard. When prompted for your Telegram bot token, paste the token from BotFather.
The wizard configures your ~/.openclaw/config.yaml with a section like:
channels:
  telegram:
    enabled: true
    botToken: "123456789:ABCDEFGHIJKLMNOPQRSTUVWXYZabcdefgh"
    dmPolicy: whitelist
    whitelist:
      - YOUR_TELEGRAM_USER_ID
To find your Telegram user ID, message @userinfobot in Telegram — it will reply with your numeric user ID.
Restart the OpenClaw gateway:
openclaw gateway restartCheck the gateway status:
openclaw statusYou should see gateway: running, provider: ollama, and channels.telegram: connected.
Verify Everything Is Working
Open Telegram and send a message to your bot. You should receive a response within a few seconds (first response may take longer as the model warms up).
Test the full pipeline with a few prompts:
Send: Hello, are you running locally?
Expected response: The model should confirm it’s running through Ollama. The response will not mention any cloud provider or API key.
Check nvidia-smi in a terminal — GPU memory usage should spike during inference, confirming local GPU execution.
Troubleshooting Common Issues
Even with careful setup, a few failure modes appear repeatedly. Here are the fixes:
openclaw gateway fails to start:
- Check that Node.js 20+ is installed:
node --version - Verify Ollama is running:
systemctl status ollama - Check the gateway log:
openclaw logs --tail 50
Telegram bot receives no response:
- Confirm the bot token in
~/.openclaw/config.yamlis correct. - Check that your Telegram user ID is in the whitelist (if
dmPolicy: whitelist). - Test Ollama directly:
curl http://localhost:11434/api/tags
Ollama runs on CPU instead of GPU:
- Run
nvidia-smi— if the GPU is not listed, the driver is not loaded. Reboot and check. - Run
ollama logsto see if CUDA initialisation errors appear. - Ensure you are not running Ollama inside a container without GPU passthrough.
High latency / slow responses:
- First response after model load always takes 5–15 seconds (warmup). Subsequent responses are faster.
- If all responses are slow, check GPU utilisation with
nvidia-smi dmon. If GPU usage stays below 30%, the model may be exceeding VRAM and spilling to system RAM. - Switch to
glm-4.7-flash(not the full model) for faster inference on 8–12 GB cards.
MoltBot Config Migration
If you are migrating from a previous MoltBot installation, your old config lives at ~/.moltbot/config.yaml. Run openclaw migrate to copy it to ~/.openclaw/ automatically. The gateway will then read from the new location. The moltbot alias remains valid post-migration.
For a deeper look at agent architectures and how to extend OpenClaw with custom tools, see our guide on building your own AI agent from scratch. If you want to connect OpenClaw to external data sources via the Model Context Protocol, read our MCP explainer.
Frequently Asked Questions
Yes. MoltBot was renamed to OpenClaw in January 2026. The underlying software is identical — only the name and primary CLI command changed. The moltbot command still works as an alias, and your existing ~/.moltbot/ config directory is automatically recognised by the new CLI. There is no migration required unless you want to consolidate to the new config path.
How Musketeers Tech Can Help
Setting up OpenClaw locally is a great starting point, but production-grade AI assistants for teams, customer support, or business automation require more than a single-server setup. Musketeers Tech designs and builds custom AI agent systems that integrate with your existing tools, scale reliably, and include monitoring and fallback logic that personal setups lack.
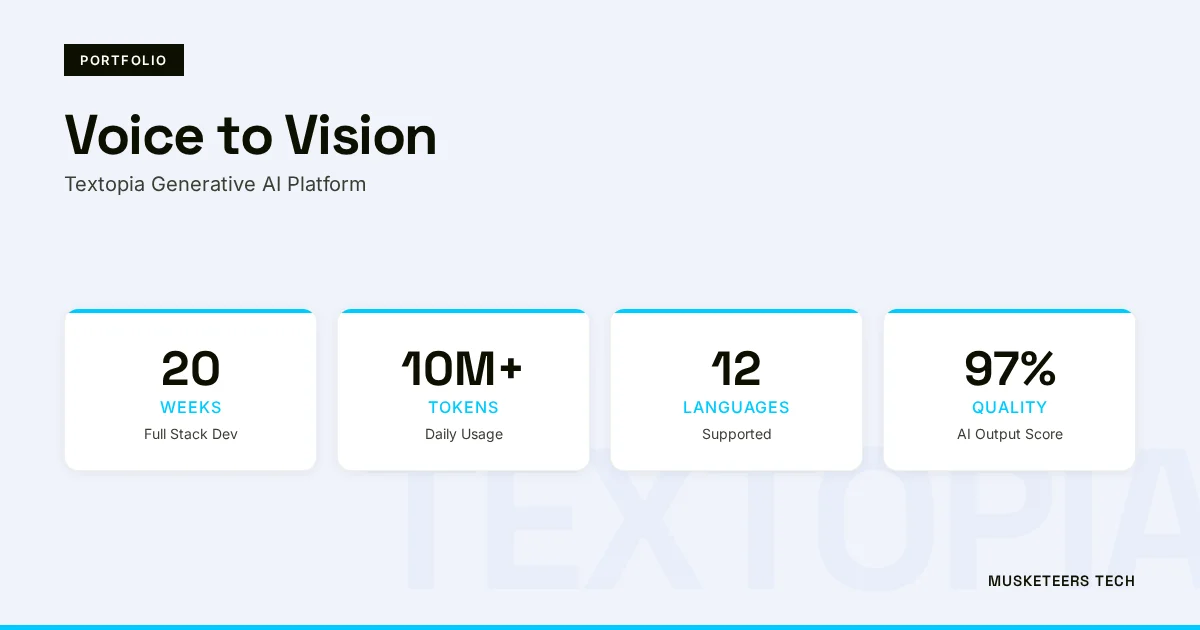
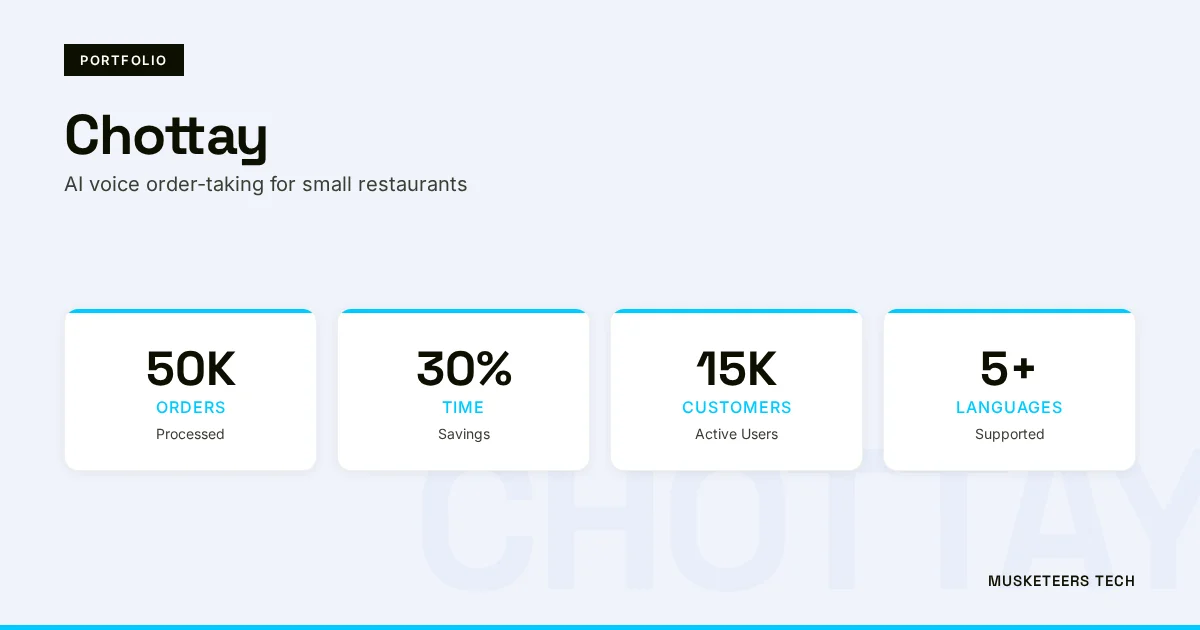
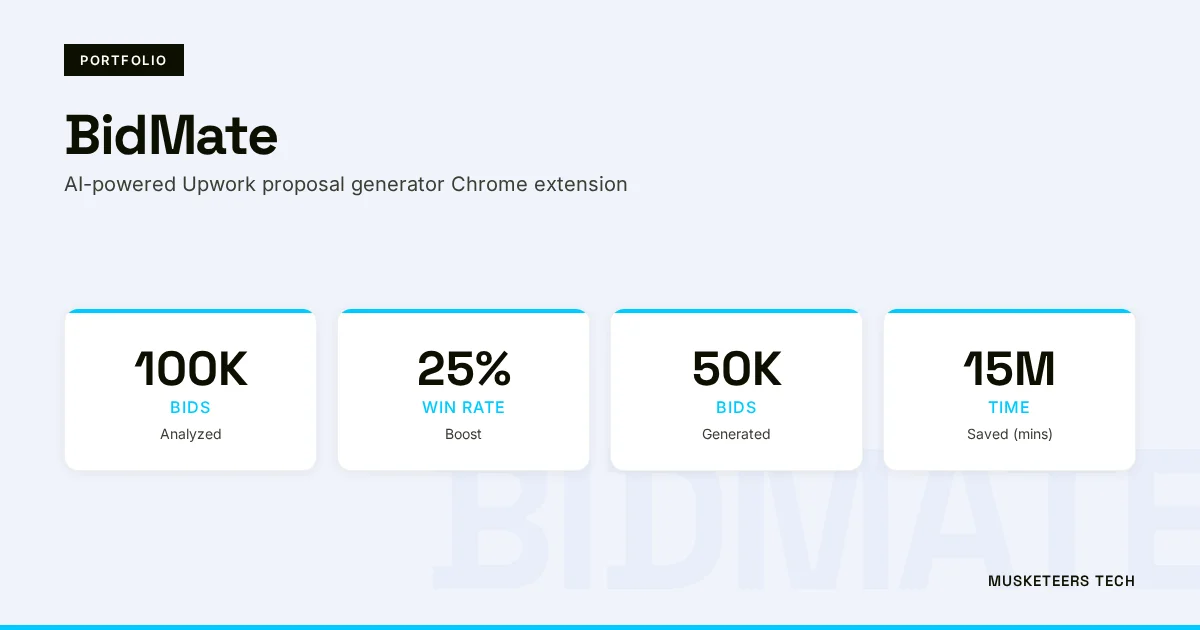
We have shipped AI assistant projects across diverse domains — from Chottay, an AI order-taking system for restaurants, to BidMate, an AI proposal assistant on Upwork. If you are considering moving from a personal OpenClaw instance to a team-wide or customer-facing deployment, our Generative AI Application Services team can architect the right approach — whether that means staying on local LLMs for privacy, using hybrid routing between local and cloud models, or integrating Model Context Protocol for tool connectivity.
AI Agent Development
Production AI agents with memory, tools, and channel integrations — built for scale.
Generative AI Application Services
End-to-end GenAI apps — from local LLM deployments to cloud-native RAG pipelines.
Final Thoughts
The OpenClaw setup on Ubuntu with NVIDIA, Ollama, and GLM-4.7 is the most practical path to a fully private, zero-cost AI assistant that lives in your Telegram. The five-step process — drivers, Ollama, GLM-4.7, OpenClaw onboarding, Telegram bot — takes under two hours on a clean Ubuntu install and produces a system that genuinely competes with cloud-based assistants on everyday tasks.
The MoltBot-to-OpenClaw rename is a cosmetic change on a maturing platform. If you are already running MoltBot, the upgrade is a single npm update -g openclaw and a gateway restart. If you are starting fresh in 2026, OpenClaw is the name to use.
For teams wanting to go further — adding retrieval-augmented generation, connecting to internal databases, or building multi-agent pipelines — read our deep-dive on autonomous workflow automation with AI agents or reach out to discuss a custom build.
AI-optimized version of this article: Read the text-only version
Last updated: 30 Mar, 2026